Electric Kettle Has White Scale: What It Is and How to Remove It
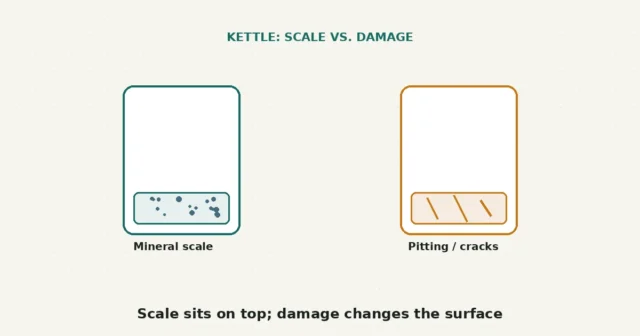
A white, chalky deposit is often mineral scale, but appearance alone cannot confirm it. Compare it with damage signs, then…
A coffee maker that brews slowly is usually a sign of mineral buildup, a clogged removable part, or a filter issue — not a failing pump or heater. Working through the checks below in order, starting with the parts you can remove and clean by hand, resolves most cases before anything more involved is worth considering.
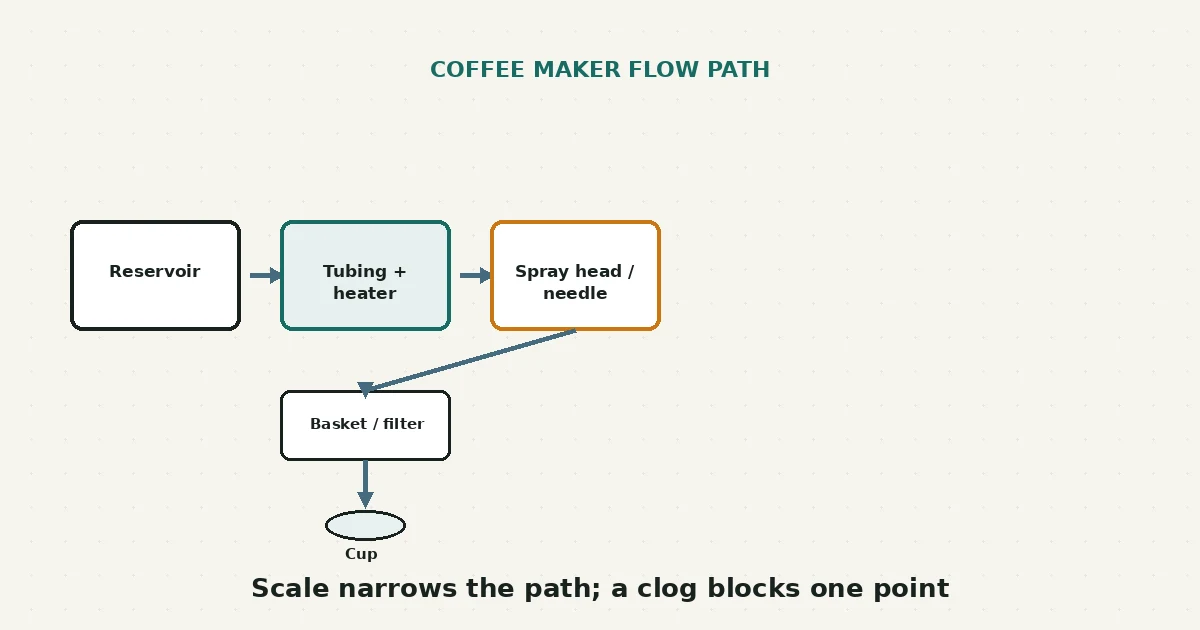
Start by checking whether the slowdown is isolated to a removable part — the basket, spray head, or a single-serve piercing needle — or whether the whole brew cycle has slowed. A partial slowdown often points to a clog you can clean yourself. A brew that has gradually gotten slower across the whole cycle more often points to mineral scale, which calls for a manufacturer-approved cleaning or descaling cycle rather than a specific home remedy.
Two very different things can look like “brewing slowly,” and it helps to know which one you’re dealing with before choosing a fix. The first is a clog somewhere water has to pass through on its way to your cup — a blocked spray head, a clogged single-serve needle, or a stopped-up basket. The second is mineral scale, which builds up gradually inside water lines and around the heating element wherever water is heated repeatedly, and which restricts flow and can lower brewing temperature over time. Both are common and neither points to a defective machine.
What this guide does not cover is a pump, heater, or electrical fault. If cleaning and descaling the removable, user-accessible parts doesn’t restore normal brew speed, that’s a reasonable point to stop and contact the manufacturer rather than opening the housing.
It also helps to separate “slow” from “different.” Some machines are simply slower by design — a single-serve brewer using a larger cup size, or a drip machine on a stronger-brew setting, takes longer than a quick small-cup cycle, and that’s not a sign of a problem. What this guide is aimed at is a change from your machine’s own normal pace: a cycle that used to take two minutes and now takes five, or a single-serve cup that used to dispense steadily and now trickles out unevenly.
| What you observe | Possible explanation | Reasonable next step |
|---|---|---|
| Slowdown only with certain pods or grounds, or only from one spot | A clogged single-serve needle or blocked spray head/basket | Clean that specific removable part first |
| Gradual slowdown across the whole brew cycle over weeks or months | Mineral scale in the water lines and heating element | Run a manufacturer-approved cleaning or descaling cycle |
| Coffee also tastes flat, bitter, or “off” | Often accompanies scale buildup, though flavor can have other causes too | Descale first, then reassess taste separately |
| Sudden full stop rather than a gradual slowdown | May point to a fault beyond cleaning | Confirm water supply and power first; contact the manufacturer if cleaning doesn’t help |
These are patterns to help you decide where to start, not a confirmed diagnosis — a machine that hasn’t been cleaned in a long time can show signs of both at once.
This guide covers removable, user-accessible parts and manufacturer-approved cleaning and descaling cycles only. It does not cover opening the housing, and it does not cover pump, heater, or internal electrical diagnosis or repair — those require a qualified technician or the manufacturer’s service channel. If your machine is under warranty, check the terms before attempting even the low-risk steps above.
Not universally — some manufacturers specifically recommend against vinegar because of the smell it can leave in internal lines, or because their built-in cleaning cycle is designed around a different product. Check your manual before choosing a descaling method.
This depends entirely on your model and the product’s label — there’s no single ratio that applies across brands, so follow the specific instructions for your machine rather than a general rule.
Running plain water through a cleaning cycle can help flush loose debris, but it won’t dissolve mineral scale — if scale is the cause, a proper descaling cycle is what actually addresses it.
Not necessarily. Gradual slowdown tied to buildup is common and usually resolves with cleaning. A sudden, complete stop is more often a separate issue and is a better reason to contact the manufacturer.
If you’re also noticing white, chalky deposits somewhere else in the kitchen, the electric kettle scale guide covers the same mineral-buildup pattern in a different appliance. And if a dishwasher in the same hard-water kitchen is leaving film on dishes, this comparison of hard water and detergent residue uses a similar side-by-side approach.
New to RFSE? See how to approach any RFSE guide safely, or browse the full Kitchen Equipment hub for more guides like this one.
This guide is based on official manufacturer documentation current as of publication. Descaling products, dilution ratios, soak times, and cycle counts vary by model — always confirm details against your exact machine’s manual before cleaning or descaling.
A white, chalky deposit is often mineral scale, but appearance alone cannot confirm it. Compare it with damage signs, then…
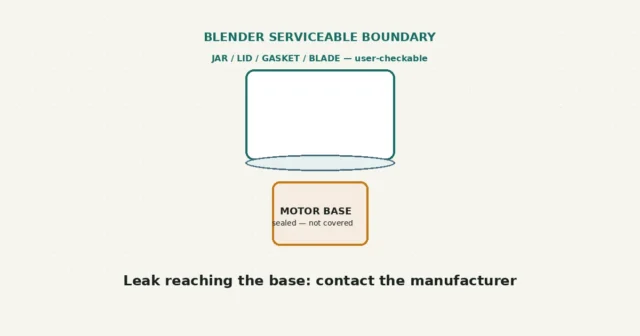
On models with removable jar parts, a gasket, collar, jar or blade assembly may be involved. Confirm the exact manual…
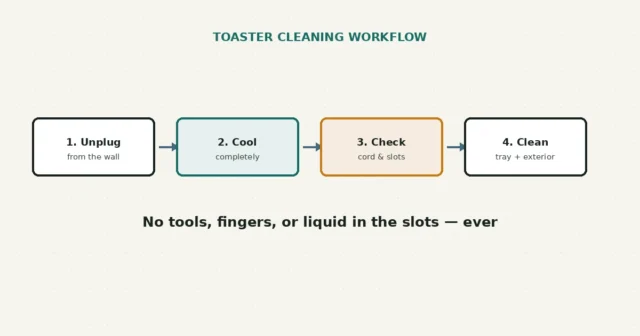
Unplug, let cool, then clean only the removable crumb tray and exterior. Crumb buildup is a documented fire risk, but…