Detergent Residue on Dark Clothes: Load, Dose and Rinse Checks
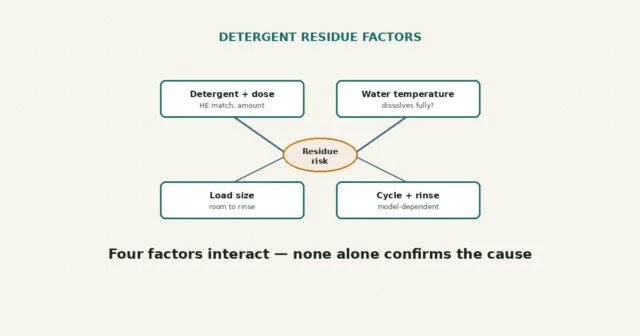
White residue may be undissolved detergent, lint or a soil–detergent interaction. HE compatibility, dose, load, water and cycle choices can…
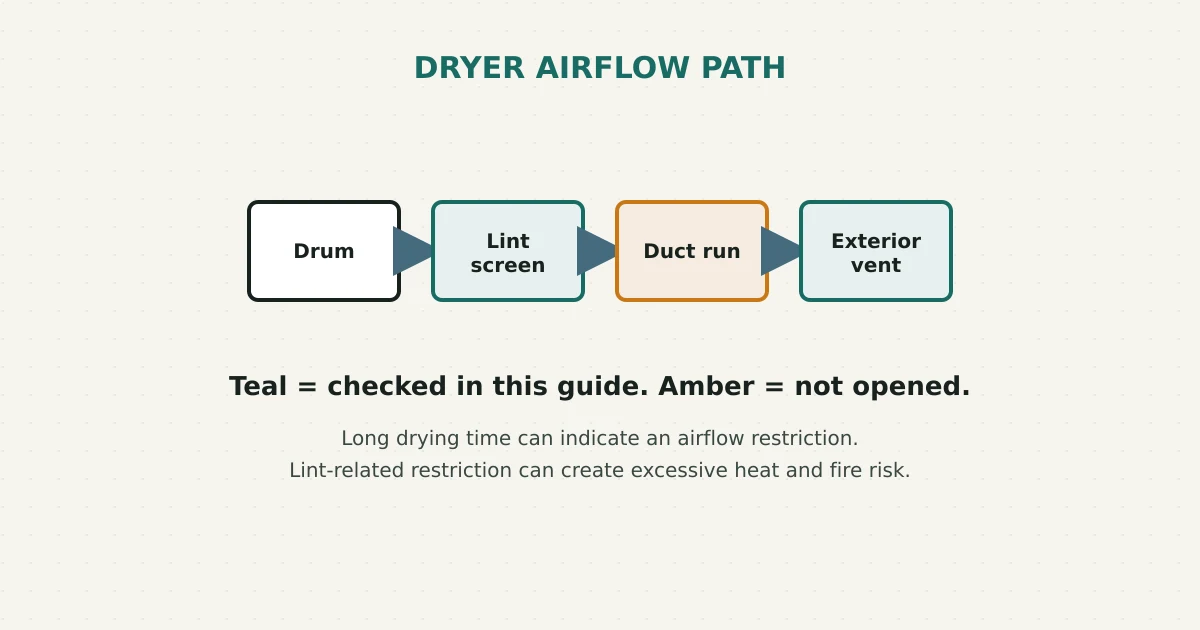

A dryer that repeatedly needs longer than normal may have a full lint screen, restricted exhaust path, unsuitable load or cycle, or another fault. CPSC says long drying time can be a sign of a blocked screen or exhaust duct, and separately warns that lint-related airflow restriction can create excessive heat and fire risk.
Clean the lint screen before checking anything else. Then check your load size and cycle selection. Finally, from ground level and with the dryer running, check whether air is actually moving out of the exterior vent hood. If airflow at the exterior vent is weak or absent, that points to a blocked or restricted vent path — a reasonable point to arrange vent service rather than keep running extra cycles.
The U.S. Consumer Product Safety Commission has published guidance stating plainly that lint buildup restricting airflow is a documented cause of dryer fires, and that longer-than-normal drying times or clothes remaining damp at the end of a cycle can be a sign that the lint screen or exhaust duct is blocked. This isn’t a minor inconvenience to work around by running the dryer twice — it’s the kind of symptom safety guidance specifically asks owners to notice and act on.
The user-level checks in this guide are limited to the lint screen, load and cycle selection, and observing the exterior vent from a safe ground-level position. They do not prove the cause, and the guide stops before internal components, gas supply or fixed ducting.
| What you observe | Possible explanation | Reasonable next step |
|---|---|---|
| Lint screen visibly full or has a residue film | Restricted airflow at the screen itself | Clean thoroughly; wash with a soft brush if residue doesn’t lift by hand |
| Load was very large, tightly packed, or mixed heavy/light items | Reduced tumbling and airflow through the load | Reduce load size and compare |
| Weak or no airflow felt at the exterior vent hood while running | Vent duct may be blocked, crushed, or too long/restrictive for the model | Arrange qualified vent inspection/cleaning rather than continuing to run extra cycles |
| Dryer feels unusually warm to the touch on the outside during operation | Documented sign of restricted airflow per manufacturer guidance | Stop and check the lint screen and exterior vent; avoid continued use if warmth is pronounced |
| Problem started right after a new installation | Vent length, material, or routing may not match manufacturer specifications for the model | Compare against the installation instructions or ask the installer to confirm compliance |
These patterns are meant to guide where to look, not to confirm a specific cause — a vent problem and an overloaded load can produce very similar symptoms.
This guide stays entirely outside gas-appliance work, burners, ignition systems, fuel supply lines, fixed wiring, the internal heating element, the thermal fuse, the motor, and the cabinet or control panel. It does not specify one universal vent material, diameter, length, or clearance distance, since these depend on your exact dryer model and on applicable local building requirements — check your manual and, where relevant, local code for what applies to your installation. When the full vent path can’t be safely and completely inspected from accessible points, qualified vent service is the appropriate next step rather than continued troubleshooting.
Yes — very heavy or bulky items like comforters or a full load of towels can genuinely take longer than a typical mixed load. This guide is aimed at a dryer that consistently needs two cycles for loads that used to finish in one, not at naturally longer items.
This guide does not teach duct disconnection or cleaning. Follow the exact dryer and installation instructions; if the route is fixed, hidden, elevated or not safely accessible, use qualified vent service.
Try a smaller, typical-sized load after cleaning the lint screen. If drying time returns to normal, load size was likely a significant factor. If a normal-sized load still takes two cycles, airflow restriction becomes more likely.
The lint screen and exterior vent checks in this guide apply to both, but gas dryers involve a fuel supply and ignition system that are entirely outside this guide’s scope and outside user-serviceable territory.
If you’re working through more than one laundry appliance issue at once, the washing machine odor guide covers a similarly cautious, check-before-you-clean approach for a different machine. And if towels specifically aren’t drying or smelling right, this towel odor guide looks at drying time as one contributing factor.
New to RFSE? See how to approach any RFSE guide safely, or browse the full Laundry & Cleaning hub for more guides like this one.
This guide is based on official CPSC safety guidance and manufacturer documentation current as of publication. Vent specifications and installation requirements vary by model and by local building requirements — always confirm details against your exact dryer’s manual.
White residue may be undissolved detergent, lint or a soil–detergent interaction. HE compatibility, dose, load, water and cycle choices can…
A musty smell may involve trapped moisture or residue, but odor alone cannot confirm mold. Compare front-load and top-load checks…
A full bin or bag, dirty filter, blockage or poorly seated part can reduce suction. Follow the model-approved airflow checks…