Freezer Frost on Drawers: Air Leaks, Blocked Vents and Next Steps
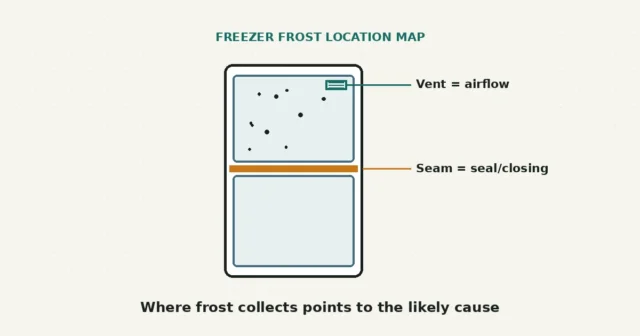
Where frost collects can guide the first inspection, but it does not confirm a cause. Check closure, seals, humidity and…
A refrigerator door that won’t seal usually comes down to one of four things: something is blocking the gasket, the gasket is dirty or out of shape, the fridge isn’t level, or the gasket has genuinely failed and needs replacing. Work through the checks below in order, starting with the one that takes ten seconds and costs nothing.
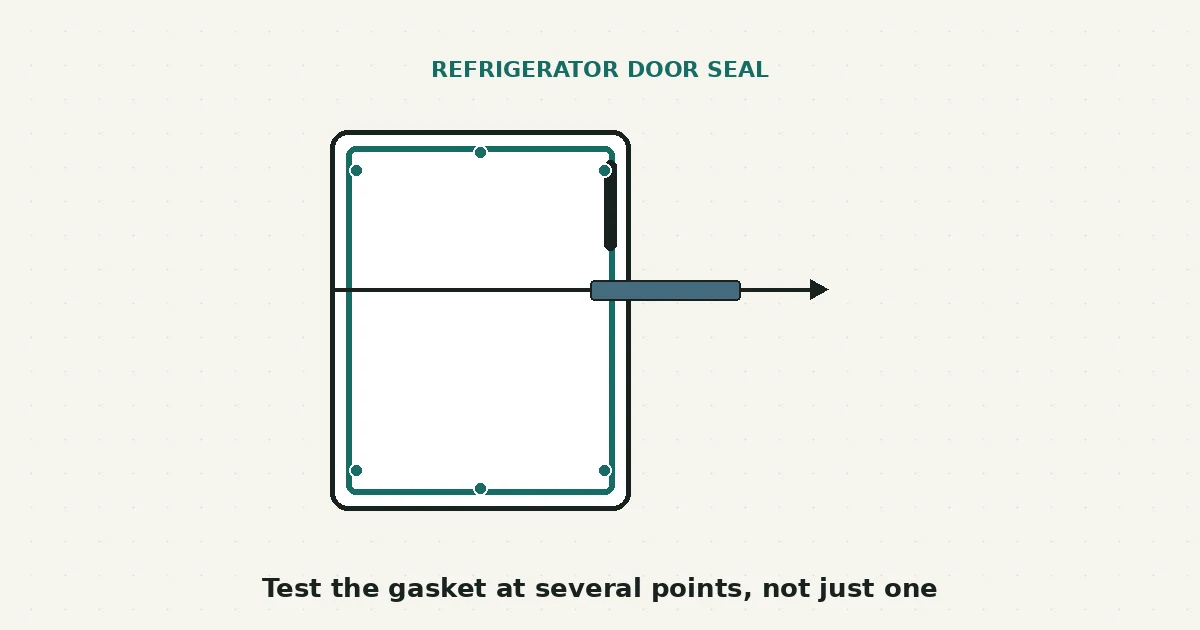
Start by looking for anything pinching the gasket — a shifted shelf, a tall bottle, a bin pushed too far forward. Then wipe the gasket clean and run the paper test below at several points. Uneven resistance identifies a place to inspect more closely; it does not by itself prove whether dirt, alignment or the gasket is responsible.
The gasket — the flexible strip around the inside edge of the door, sometimes called the door seal — has to press evenly against the cabinet frame all the way around. A gap can admit warm, humid air, which may show up as condensation, frost or longer cooling cycles. Those signs are reasons to inspect the door area first, not proof that a sealed-system component has failed.
The safe checks here stay at the door: remove obstructions, clean the gasket and compare how evenly it contacts the cabinet. They do not require opening panels or touching wiring.
You don’t need to unplug the refrigerator for the checks in this guide — none of them involve opening the cabinet, removing panels, or working near wiring. That said, a few quick things are worth confirming first:
This common screening check needs only a strip of ordinary paper. It can reveal uneven contact, but it cannot identify the cause on its own.
| What you observe | Possible explanation | Reasonable next step |
|---|---|---|
| Weak spot only at one corner or edge | Localized dirt buildup, a fold in the gasket, or minor door misalignment | Clean that section thoroughly and recheck before assuming the gasket needs replacing |
| Weak spot everywhere you tested | Flattened, hardened, or worn gasket material | Compare age and condition against your model manual; a replacement gasket may be the right fix |
| Door swings open on its own or won’t latch fully | Refrigerator not level, or something pushing outward from inside | Check leveling legs and shelf/bin placement before touching the gasket itself |
| Visible tears, cracks, or a gasket pulling away from the door | Physical damage to the gasket | Photograph it and check your model’s parts diagram; this usually calls for a replacement part rather than repair |
Treat all of the above as a starting point for your own judgment, not a confirmed diagnosis — the same symptom can have more than one cause, and your model’s manual is the most reliable way to narrow it down further.
A few habits go a long way toward keeping a gasket sealing well for years:
This guide stops at the door and gasket, which is the user-serviceable part of the system. It does not cover the compressor, refrigerant lines, defrost heaters, electrical controls, or any sealed component behind the interior walls or the rear panel — those require a qualified appliance technician. If your fridge is under warranty, check the terms before attempting even the low-risk steps above, since some warranties specify who may perform maintenance.
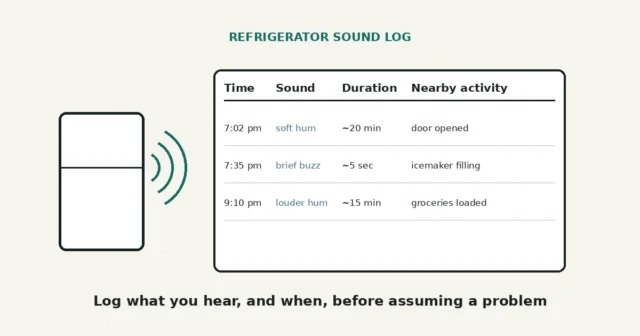
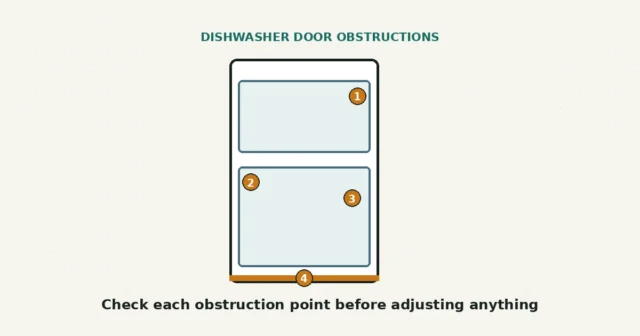
If your refrigerator has also started sounding different lately, logging what you're hearing and when can help separate normal operation from something worth a closer look. A door that won’t seal can sometimes show up alongside frost building up faster than usual, since both often trace back to warm air finding a way in. And if it’s the dishwasher rather than the fridge giving you trouble, hard water and detergent film uses a similar side-by-side approach to narrow down the cause.
New to RFSE? See how to approach any RFSE guide for the safety-first method behind every check here, or browse the full Appliance Care hub for more guides like this one.
A very tight seal on a new unit is common and often loosens slightly within the first few days as the gasket settles in — it’s a different situation from a seal that’s too loose.
No. Tape can interfere with the hinge or seal, leave adhesive behind and hide whether the compartment is maintaining temperature. Keep the door closed as much as practical and follow the manufacturer’s service guidance instead of improvising a latch.
A poor seal can let the interior temperature drift upward, which matters for perishable food. If you’re unsure whether your fridge has been holding a safe temperature, check it with an appliance thermometer rather than guessing from touch alone.
This varies by model, usage, and climate, so there’s no single figure that applies to every refrigerator — your model’s documentation or manufacturer support page is a better guide than a general estimate.
This guide draws on manufacturer and government guidance current as of publication. Always confirm details against your specific model’s official manual, since gasket type, leveling method, and replacement procedure vary by manufacturer and model.
Where frost collects can guide the first inspection, but it does not confirm a cause. Check closure, seals, humidity and…
Many refrigerator sounds are part of normal operation. A short timing log helps compare a new hum or buzz with…
A rack, utensil, seal obstruction or installation alignment can keep a dishwasher door from closing. Check the visible path before…